Preparing Walls for Sandstone wall tiles


The installation surface must be clean, dry and structurally sound.
When preparing existing walls to receive tile:

  • Patch any holes or wide cracks in drywall with spackling compound. Sand smooth when the patch dries.
 

Layout of the Wall Area


Walls in most houses are not square. The instructions below establish guidelines for an installation that starts in the center of a wall and proceeds  toward the edges. This method gives you equally sized cut tiles at each corner.

  • Make a layout tool. Lay out a row of tiles on the floor. Align a straight stick (1x2) with an edge against or on top of the row of tiles. Mark the tile spacing on the stick. This tool will be used in combination with a level to accurately lay out the tile spacing on the walls.
  • Use a level to extend your final reference mark into a horizontal line. This line will be where you begin laying the tile.


  • Place another reference mark on the horizontal line near the center of the room. Now use your guide to see what will happen at the corners of the room. Shift the reference mark to the side to get the tiles in the corners to line up as you wish. When you have established the desired final placement of this reference mark, use your level to draw a plumb vertical line.
  • You will begin laying the tile where the two reference lines meet. They should cross at perfect 90 degree angles. The first tile row must be as close to centered as possible. The appearance of the whole wall will depend upon it. Any error you make here will compound itself as the tiles are laid. Use the level and layout tool to mark a grid on the wall to help with the placement of tiles.
Layout Tool.
 

114    
 

Installing Sandstone wall tiles

 
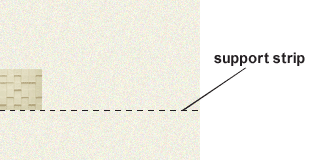
  • Attach a support strip to the bottom of your base horizontal reference line. This board will serve both and wall tile photo with ONLY 1/2 wall done. so they can see the support strip support for the tiles until the adhesive has a chance to set.
  • Spread the thin set mortar adhesive. Spaces between ridges of adhesive should be almost bare. Apply in 2 to 3 sq. ft. sections. Increase the coverage after you get a feel for setting the tiles. Spread adhesive up to, but not covering, any reference lines or marks on the wall used for positioning tiles.


  • Press the first few full tiles in place above the support strip with a slight twisting motion. Do not slide them.
  • Continue aligning and adhering tiles. Work in a pyramid shape from your crossed reference lines¡ªoutward and upward.
  • If adhesive oozes up between the tiles, clean out the excess before it dries. Immediately wipe off any adhesive on the face of the tiles with a solvent-soaked sponge or rag.
  • After you have installed several rows of tile, set them into the adhesive with the tile leveler and a mallet.
  • Tile the wall up and across to the edges where trimming will be required, then remove the support strip and install the tiles that go beneath it.
  • Measure the area along the edges and carefully cut tiles to fit. Install the edges and trim.
  • When the job is complete.

Cutting and Fitting Sandstone wall tiles


Nearly every tiling job requires trimming tiles to fit around borders or obstructions such as electrical fixtures, Straight cuts are relatively simple. Shaping   tiles to fit curves is more difficult and requires practice and patience.
use a simple tile cutter. They make clean cuts with little waste.
Apply even pressure when using tools designed to score, cut and drill tiles. Pressing too hard can cause tiles to crack and break. Drilling tile requires a   special bit.
When using a tile cutter, score the tile in one stroke to achieve smooth and even breaks. Repeated scoring will cause the tile to chip or crack.
Always wear safety glasses when working with tiles.

  Snapping tile by hand

  • With the scored line facing up, position the tile over a nail or a stiff piece of wire.
  • Lay your fingers flat on either side of the tile and apply firm, even pressure until the tile snaps.

  Using tile nippers

  • Center the cutting blade on the scored line and exert pressure by squeezing the handles together.
  • Use your free hand to hold the side of the tile you will be using.

  Using a tile cutter

  • Measure and mark the cutting line on the tile.
  • Align this mark with the cutting guide on the tile cutter.
  • Supporting the tile to keep it level, lower the cutting wheel onto the edge of the tile. Push it away from you with firm pressure.
  • When you've rolled the cutting wheel to the far end, push down on the handle to split the tile.

Smoothing Rough and Jagged Breaks


Use 80 grit sandpaper. The wall tiles with turn white when sanded or cut lightly touch with damp spong. Light water will remove the white marks.


sy001


1

SAFETY NOTE
Some adhesives emit toxic and flammable fumes. Provide good ventilation, especially in confined locations such as shower stalls. Always refer to the product label for safety precautions.

Exercise caution when using tile-cutting tools.

2


copyright Historic Mantels Limited